Thursday, October 27, 2011

Link your Projects New Segment!!! "Quilling It Thursdays- Episode 1

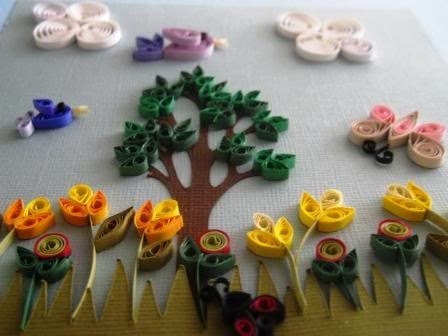
Good Morning my Quilly and non-Quilly friends! Welcome to Episode 1 of My Quilling Nest's "Quilling It Thursdays" Segment.  Every Thursday I will be posting a project, tip, and or a new technique on Quilling and you will have the chance to Link Up your Quilled Projects- Beginners and Advanced Quillers Welcomed!!  I will draw a Winner every 4th Thursday from all the Linked up projects.  I will also be posting challenges and will have Guest Designers too, you might be one of them so stay tuned.  The more you participate the more chances you have at winning and or becoming one  of the Guest Designers.  I hope you can participate and play along with me.  This segment will allow us to get to know each other's creations and each others blog's.  Let's get started! Here's a video of a project I made for yesterday's post at Alex's Blog "You Had Me at Craft" . Sorry I was not able to post the one I had for today.  This had been a very hectic week for me.  My dad had surgery and my 6 year old has been sick.  Hope you enjoy this one...


Here's the Project:


Now it's your turn to Link Up your Project! 

Have Fun and Quilly Hugs to All,


Linda K.


Wednesday, October 26, 2011

Guest Designer Lala-Palooza @ You Had Me At Craft!

Hello Quilly Friends and happy Wednesday to you!  Today I am honored to be a  Guest Designer  over at You Had Me at Craft...you are welcomed to come and see the project I made and a video tutorial too!!!


Thursday, October 20, 2011

"WINNER" of KinderStampO's Holloween Altered Frame Blog Hop

Happy Thursday Everyone! I hope everyone is having a wonderful day enjoying this beautiful weather. Here in NY the temperature is supposed to hit the 70's yay! Please bear with me since my post for today is a bit lenghty since I need to annouce and tell you about a few things. Ok on to my post.. for today' project I made another Giftcard Holder using My Creative Time's Embossed Giftcard Holder Die, I embellished it with Quilling of course and I used the KinderStampO's Vintage and Traditional Holiday Stamp Sentiment...


Here's the Winner of this past weekend's KinderStampO's Holloween Altered Frame Blog Hop. 

Paula
from

Congratulations Paula!!! You won a pack of My Quilling Nest's Box-Envelopes 
Please Email me your address.

Here's a pic of me and my new look...what do you think?  Many would ask why? but my reason behind it is a very special one.  I donate my hair to Locks of Love a public non-profit organization that provides hairpieces to financially disadvantaged children in the United States and Canada under age 21 suffering from long-term medical hair loss from any diagnosis.  You can read more about this Organization HERE


 and last but not least next Thursday I will be starting a new Segment called "Quilling It Thursdays".  In this segment I will be posting a Quilling Project with full instructions and or a Technique, and you will have a chance to link up your Quilling Projects for a chance at Blog Candy, what do you think?  
Thank you for bearing with me today and my lenghty post, I will be back again with another project.  Until then...
Quilled Hugs to you!

Linda K. 


Saturday, October 15, 2011

KinderStampO's Holloween Altered Frame Blog Hop

 Hello and Welcome to the Kinderstampo's Holloween Altered Frame Blog Hop.  If you came from PAM's Blog you are headed the right way...if you just stop buy feel free to join in the fun and begin hopping at JESS's Blog.  The challenge for this Hop was to altered a Frame, since I don't celebrate Holloween I decided to alter a frame and make it a Fall theme instead. I have a picture of my grandmother that I would like to place in this frame, I know it will be perfect for it.  So,  here it is my Altered Frame..


This is the Frame that I used.  It's one of the $1.00 frames from Michael's .  I sprayed it with Tsusineko Eucalyptus Walnut Ink.  Spread the ink with a sponge.  I then Stamped the frame with a swirl stamp  using Versamark Ink.  I embellish it with Quilling, I use the 3/8" quiling paper.  I also use the Kinderstampo's Every Day Spanish Sentiment Stamp set to stamp "Abuela" and the Charm is also from Kinderstampo.  I cut the loop of the charm with wire cutters and voila! hahahaha...  I also stamped the back of the frame with one of the sentiments from My Quilling Nest's "Quilled with Love" Stamp set.

These Pics are of the Materials I used.


I hope you find lots of inspiration from all these lovely blogs.  Be sure to leave comments at every stop for chance at Blog Candy. 

MY BLOG CANDY
One winner will be chosen from the comments left on my blog.  Please don't forget to leave your email and or Blog's address so that if you are the winner I can easily get in touch with you...:)
GOOD LUCK EVERYONE!

Your Next Stop is  KARI

Thank you for hopping along with us today!!
Quilled Hugs,
Linda K.
Jess- www.kinderstampo.com

Friday, October 14, 2011

"Gift Card Holder" and "Quilled with Love" Stamp Set

Hello Crafty Quilly friends and happy Friday to you all!
I am so happy Friday is finally here.  Tomorrow I will be joining the Long Island Quillers Group for their 8th Annual Quilling Meet up and I am super excited!  I will definitely be sharing pictures and the projects we make on  a post next week.  Today's project is a Gift Card holder I embellished with Quilling.  I also  stamped the back of my project with one of My Quilling Nest's "Quilled with Love" Stamp sentiments.  The Gift Card holder is the "Embossed Gift Card Holder Die" from My Creative Time.  I love dies and this one has become one of my favorite ones.  Here's my project...


The Quilling was made using open scrolls and marquise shapes


For the label I used Stampin Up's Fancy Label Punch, Four Frames Stamp.  
The Sentiment is  from My Creative Time's "This & That" Stamp Set


Here's the back of my project and I stamped it with one of the Sentiments from My Quilling Nest's "Quilled with Love" Stamp set.


Hope you enjoyed my gift card holder.  I will be making tons of these for Christmas gift giving that's for sure!
Thank you for taking the time to stop by I will see you again soon with another Quilled Project.

Quilled Hugs,
Linda K.

Wednesday, October 12, 2011

KinderStampO- "Sketchy Wednesday"-Fringed Flower and a Butterfly

Good morning everyone and welcome to another one of KindeStampO's Sketchy Wednesday.  Here's the project I made for today's sketch.  If you would like to see more projects with this weeks sketch you can visit KinderStampo's blog

"A Fringed Flower and a Butterfly"
For my card I used Stampin Up Cardstock.  The Sentiment is the KinderStampO's Every Day Spanish Sentiment Stamp.  The butterfly stamp I used I cannot remember who makes it.  I bought it at Target about 2 years ago, sorry :(.  I also used the Spellbinder's Ribbon die.  The scallop punch is an EK Success border punch.  I fringed a flower and added Martha Stewart glitter.


Thank you for stopping by.  If you would like to play along with us you can link your projects over at Jessica's Blog...KinderStampO.
Have a wonderful day and I will see you back with another project.

Quilled Hugs,
Linda K.

Wednesday, October 5, 2011

KinderStampO- "Sketchy Wednesday"

Good Morning and Welcome to another week of the KinderStampo's Sketchy Wednesdays.  Sorry I decided to make a card without Quilling this time.  I wanted to make it a bit different and practice my stamping...hehehe..
Today's project was based on this sketch...


and here is my take on it...
"Sending you lots of Happiness"
(Enviandote Muchas Felicidades)
For my little Owl Card I used Stampin' Up Cardstock, Punch Bunch Stamp Set, Owl Punch, Bird Punch for the Leaves, Sizzix Buttons Embosslits Die. 
The Sentiments are from the KinderStampo's Every Day Spanish Set. 


I decorated My Quilling Nest's Box Envelope to coordinate with my card. These envelopes come flat and you can decorate them as you wish.  For this one  I used the Market Street Stamp Woodgrain Background Stamp.  Let me just tell you that I am not a great stamper, but recently I bought the Rock a Blocks from Crafter's Companion and all I have to say is that I am in love with them!  My stamping is so much better with these blocks...Hooray for me...lol.
 and here's my card tucked away, ready to be send inside My Quilling Nest's Box-Envelope.  If you are interested in purchasing these envelopes you can find them HERE.

Thank you for stopping by, I hope to see you again soon with another fun project.

Quilled Hugs,
Linda K.